> For the complete documentation index, see [llms.txt](https://docs.torque3d.org/llms.txt). Markdown versions of documentation pages are available by appending `.md` to page URLs; this page is available as [Markdown](https://docs.torque3d.org/for-artists/assets/what-are-assets.md).
# What are Assets?
## What are assets?
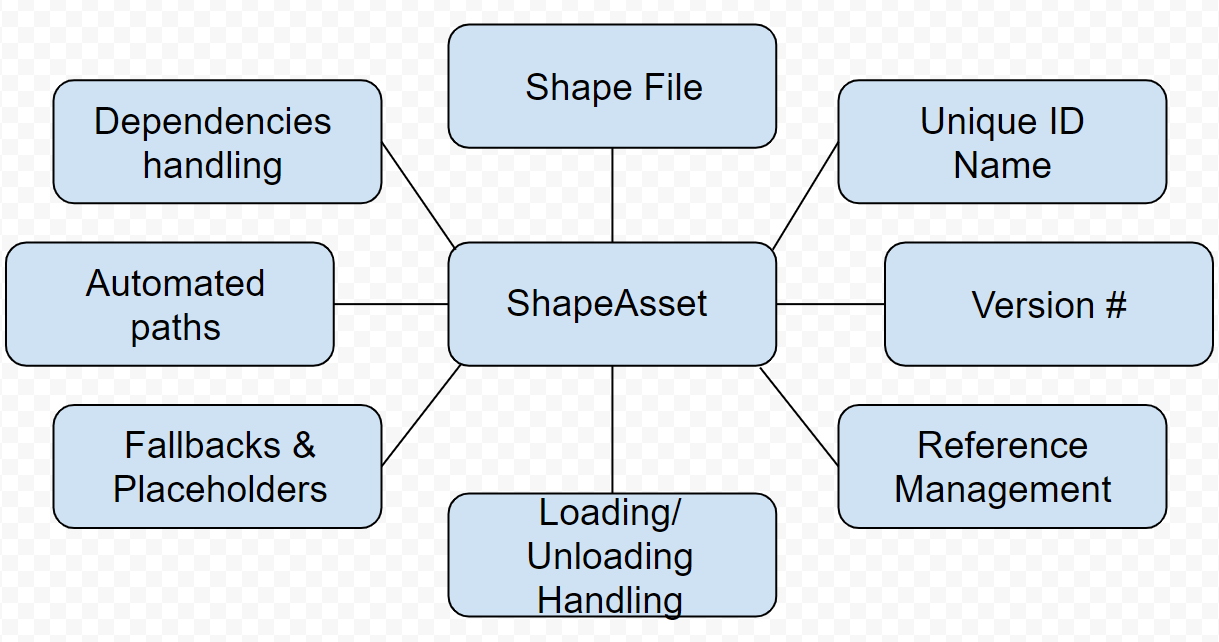
Assets, as far as Torque3D 4.0 is concerned, is a means of tracking a game’s content via metadata. There are many types of assets: shapes, materials, images, levels, sounds and so on. Unlike a simple file path reference, the metadata an asset provides gives a litany of supporting data and utility.
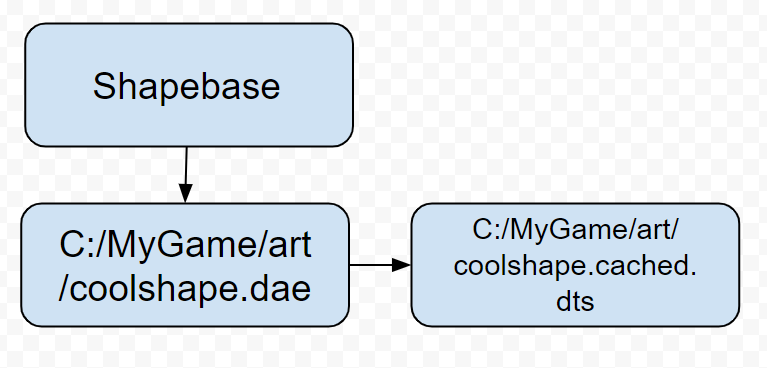
Classically, engine assets such as shape files were simply the literal files themselves. A class or object that would want to use said shape file would have a filepath field that would point to it, and the class would process it. In a few special cases, like shape files, the loader logic for the shape would run some logic during load to generate secondary files. For shapes, you’d have your engine-formatted \*.cached.dts data, the shape constructor script file, etc.
Loading resources the classical way An example of when the shape is loaded can be seen here. We pass in the filepath into the resource loader, and in the case of Shape resources, would generate the \*.cached.dts file if it didn’t exist, and load it if/when it did, returning the shape resource.
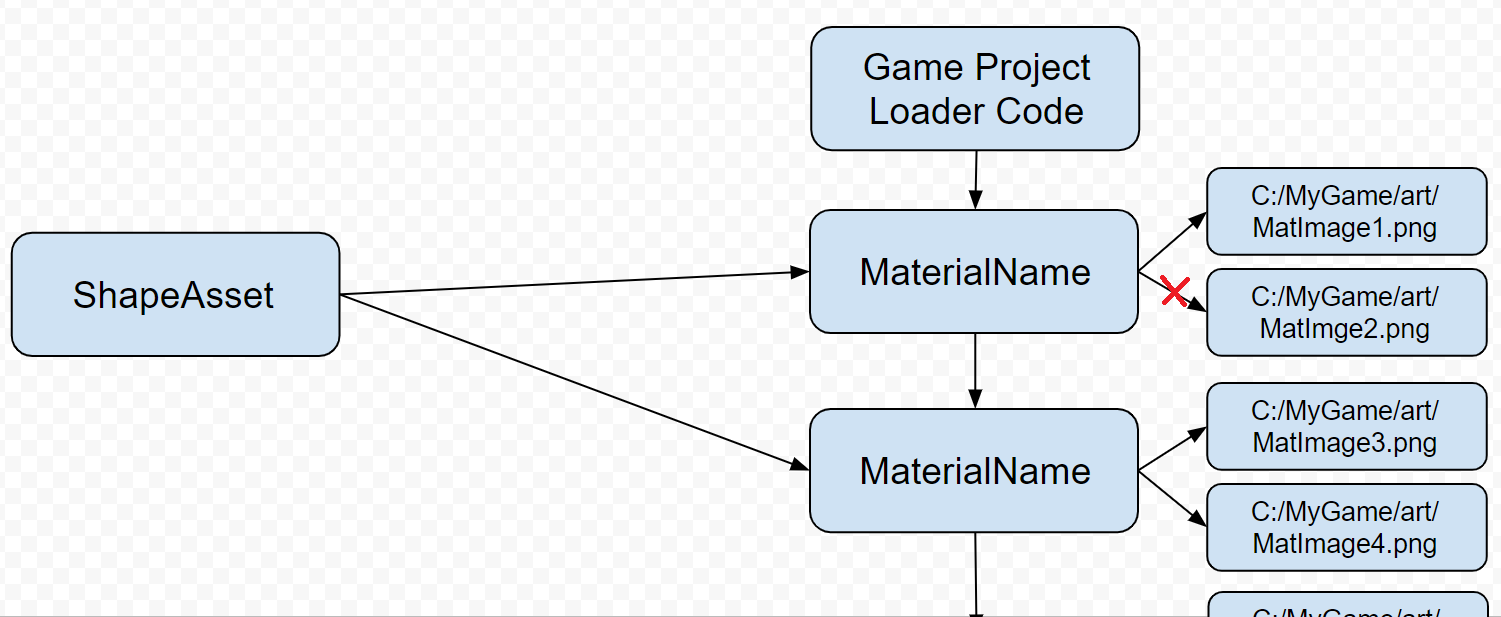
One of the problems, however, was it relied on a direct file reference.
If for any reason - a typo, the file was moved or deleted or so on - the file was not found at the file path, it broke.
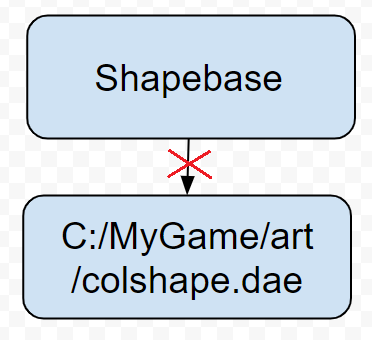
When this happened, the object would fail to load, and then would not exist in the scene. This made the level editor particularly dangerous, as if the objects failed to load their shape files, they wouldn’t be added to the scene at all, and if the mapper failed to notice missing objects and saved, they were gone for good.
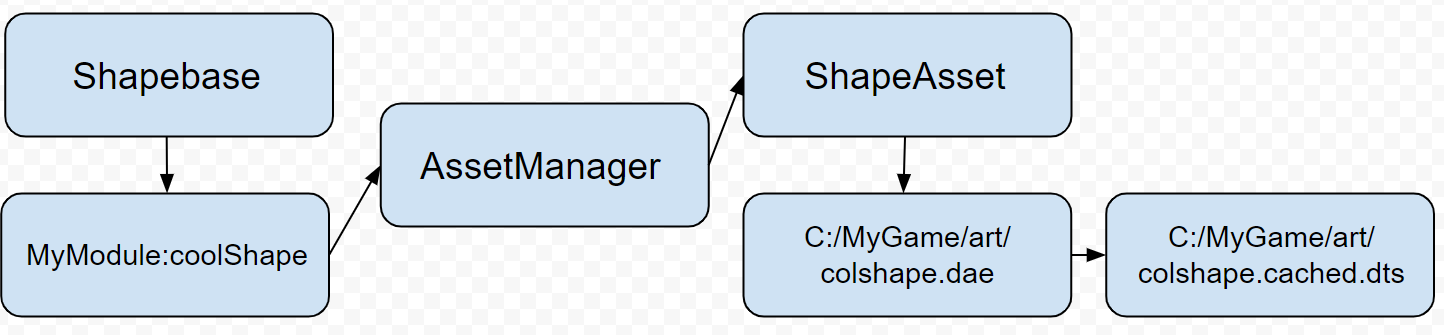
### Loading resources the Asset way
The asset system sidesteps this issue by instead utilizing unique id names to reference, similar to referencing an object by name. The asset itself handles the path info, and game objects themselves need only request the unique id name.
This means that if the shape’s file path was spelt incorrectly, or was moved, then as long as it’s correct in the asset metadata, any object with the assetId will get the correct path.
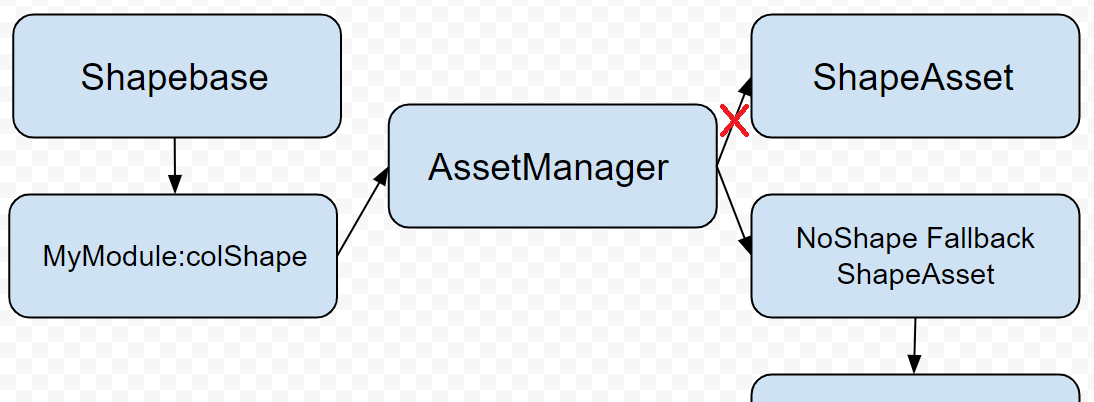
Another useful aspect is how assets handle fallbacks. In the event an asset isn’t found, or something is not loaded correctly preventing the asset from being used, it can safely fall back to a placeholder asset without ‘damaging’ the original data. As previously noted, the old way, this meant that the object did not load at all, causing problems with the map.
Instead, the asset system can realize it failed to find or load the requested asset, and provide a placeholder fallback. This allows the level to load as normal, and present obvious indicator content to the level editor or testers that something did not load as was expected, without harming the level file as it’s otherwise being worked on. This prevents the problem from holding up other team members’ tasks.
Other issues often faced in the legacy, path-based resources were order of operations and dependencies loading. To ensure materials were loaded before they were needed(as there was no way to associate materials to what used them), the game template would just scan all material.tscript files and bruteforce load everything ahead of time. This could lead to longer startup times, and could be an exploitable vulnerability, as well as often loading a ton of additional material into memory that wasn’t needed.
It could also suffer from similar path unreliability issues if paths the materials relied on for image maps or the like were invalid due to misspellings, or being moved.
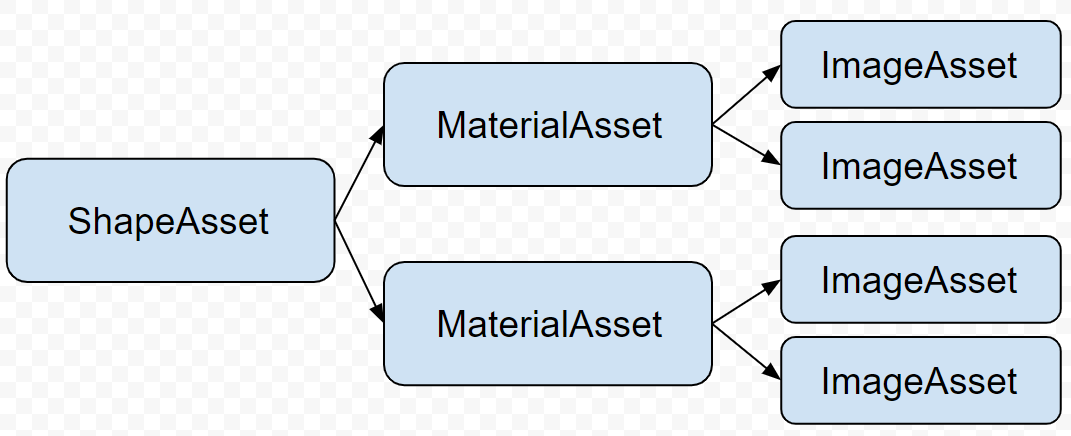
Assets, however, allow integrated dependency tracking. When an asset, such as a shape, is loaded, it has its own list of dependencies.
Because asset loading is reference-based. Only assets that are actually called get loaded. When they go to load, it checks for any dependencies in the asset metadata, and loads them first. Those assets load in a similar way, continuing until the dependency chain is complete.
In the above example, the shapeAsset is loaded, but it relies on 2 material assets. It loads those, but those themselves have dependencies to image assets, so those are loaded. Once the entire dependency chain is loaded and valid, the shapeAsset is ready and passed back to the game object that wanted to use it. If anything goes wrong, each can provide a fallback placeholder to ensure things load correctly, while still indicating what and how it failed to provide more info for debugging.
Because assets’ loading is reference-based, when all the references are removed, such as when a level is unloaded, the asset can too be unloaded. This makes post-level cleanup easy, and goes a long way to ensure only memory and resources in use actually get consumed.